Quick answer: Professional sticker sheets need printable vinyl, a cutting machine, and silicone release paper as backing. The release paper lets each sticker peel cleanly without tearing or leaving residue.
A friend of mine started selling stickers at a local craft fair last spring. She had great designs - really eye-catching stuff - but every single one was individually cut and stuck to wax paper with a piece of tape. Customers would peel them off and the backing would rip. Or worse, the adhesive would grab onto the wax paper and the sticker came up looking like it had been through a washing machine.
She asked what she was doing wrong. The answer was pretty simple: she wasn’t making proper sticker sheets.

Real sticker sheets - the kind you see from professional sellers on Etsy or at craft markets - use proper backing material and kiss cuts so every sticker peels off perfectly. And the good news? You can make them at home with about $50 in supplies and a basic cutting machine.
I’ve walked a few people through this process now, and the biggest reaction is always the same: it’s the backing material that makes or breaks the final product. So let’s get into it.
What Supplies Do You Need to Make Sticker Sheets?
You need five things to make professional sticker sheets at home: a printer, printable vinyl or sticker paper, a cutting machine, design software, and silicone release paper for backing. Most crafters already own three of those.
Here’s the full rundown:
- Printer: Any inkjet works for matte vinyl. Laser printers work better for glossy or waterproof vinyl. Even a $60 inkjet produces sellable results based on what crafters in the community report.
- Printable vinyl: This is your sticker material. It comes in matte, glossy, holographic, and waterproof varieties. For sticker sheets, go with full-sheet printable vinyl (8.5” x 11”) so you can fit multiple designs per page.
- Cutting machine: A desktop vinyl cutter handles the kiss cuts. Set it to cut through the vinyl layer only, not the liner underneath.
- Design software: Free options work fine for layout. You need to arrange multiple sticker designs on a single sheet with proper spacing (at least 3mm between designs).
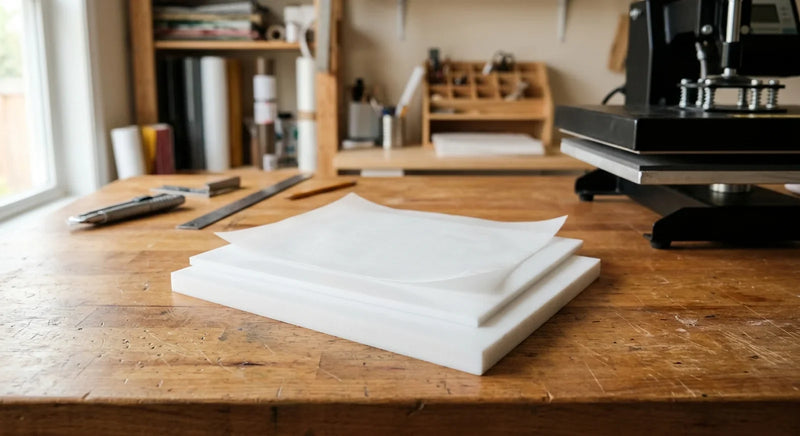
- Silicone release paper: This is your professional backing material. It replaces the flimsy liner that comes with printable vinyl and gives your sheets that clean, store-bought feel.
A laminate layer is optional but recommended if you’re selling stickers. It adds UV protection and water resistance for about $0.10 per sheet.
Why Does the Backing Material Matter So Much?
Silicone release paper provides a consistent, low-tack release surface that lets stickers peel cleanly every time without leaving adhesive residue or tearing. The backing is literally 50% of what makes a sticker sheet work.
I can’t tell you how many times we’ve heard from crafters who spent hours designing and printing gorgeous stickers, only to ruin them with cheap backing. Regular paper sticks too much. Wax paper is inconsistent. Parchment paper from the grocery store? It curls, it wrinkles, and the coating isn’t uniform.
Silicone-coated release paper is what the pros use because the silicone coating creates a uniform nonstick surface across the entire sheet. Every sticker peels with the same light pressure. No hot spots where the adhesive grabs. No thin spots where the backing tears.
And here’s something most beginners don’t realize: the thickness of your backing paper affects the final product too. Thin backing (under 40 GSM) feels flimsy and bends when customers handle it. Quality release paper in the 60-80 GSM range gives your sticker sheets that satisfying stiffness that says “this person knows what they’re doing.”
One community member put it perfectly: “I switched from wax paper to silicone release paper and my return rate dropped to zero.” Customers notice the difference, even if they can’t articulate why one seller’s stickers feel more professional than another’s. It’s the backing.
How Do You Layout Multiple Stickers on One Sheet?
Arrange your designs in a grid pattern with 3-5mm spacing between each sticker and at least 6mm margins on all edges to prevent cutting errors. Most crafters fit 8-15 stickers per letter-size sheet depending on design size.
The layout process is where planning pays off. One community member shared her approach and it’s become my go-to recommendation: start with your largest design in the top-left corner, then fill remaining space with smaller designs. Think of it like a puzzle.
Some layout tips that actually work:
- Group similar-sized stickers together. A row of 2-inch circles above a row of 1-inch squares is easier to cut accurately than mixing sizes randomly.
- Add registration marks if your cutting machine supports them. These small printed marks tell the machine exactly where each cut should go.
- Leave extra margin on the bottom edge (10mm instead of 6mm). Printers tend to be least accurate at the trailing edge of a sheet. That extra buffer prevents trimmed designs.
- Print a test sheet on regular paper first. Hold it up to the light against your vinyl material to verify sizing before committing to the good stuff.
Once your layout is set, save it as a template. You’ll reuse it constantly!
How Do You Kiss Cut Stickers Without Cutting Through the Backing?
Set your cutting machine blade depth to penetrate only the vinyl layer (typically 0.1-0.2mm) while leaving the liner intact, and run a test cut on scrap material before committing to a full sheet. This is the step that separates amateur stickers from professional ones.
Kiss cutting sounds intimidating, but it’s really just a pressure adjustment. Every cutting machine handles it slightly differently, but the concept is the same: you want the blade to slice through your printed vinyl without touching the backing sheet underneath.
Start by adjusting your blade to the shallowest setting. Run a test cut on a small section of scrap vinyl. Peel the cut piece - if it lifts cleanly and the backing shows only a faint impression (not a full cut), you’re golden. If the blade went through the backing, reduce pressure by one increment and test again.
A few things we’ve learned from the crafting community:
- Speed matters. Slower cutting speeds (around 3-5 on most machines) produce cleaner edges on detailed designs. Fast cuts work fine for simple circles and squares.
- Blade condition matters more. A dull blade tears vinyl instead of cutting it. Replace your blade every 15-20 sheets for consistent results.
- Material thickness varies. If you switch vinyl brands, always re-test your kiss cut depth. A 0.1mm difference in vinyl thickness can mean the difference between a perfect kiss cut and a cut-through.
Once you’ve dialed in your settings, write them down! I tape a note to my cutting machine with the exact pressure, speed, and blade depth for each vinyl type I use. Saves me a test sheet every single time.
How Do You Apply Release Paper Backing to Finished Sticker Sheets?
Peel the original liner from your cut sticker sheet, align silicone release paper along one edge, and use a squeegee or credit card to press it down smoothly from one side to the other to prevent air bubbles. This step takes about 30 seconds per sheet once you get the rhythm.

This is where your sticker sheets go from homemade to pro. The process is simple but technique matters:
Step 1: Cut your silicone release paper to match the size of your sticker sheet. I like to leave an extra 2-3mm on each side so there’s a clean border visible behind the stickers. It looks more polished.
Step 2: Peel back about an inch of the original vinyl liner from the top edge. Don’t peel the whole thing at once - you’ll get bubbles and misalignment.
Step 3: Align the release paper to the exposed adhesive strip. Press firmly along that top edge.
Step 4: Slowly peel the original liner while simultaneously pressing the release paper down with a flat edge (a credit card or bone folder works great). Work top to bottom in a smooth motion.
Step 5: Flip the sheet over and run your squeegee across the vinyl side to ensure full contact between adhesive and release paper.
And that’s it! Your sticker sheet now has professional backing. Each sticker will peel with a satisfying, clean release.
Pro Tip: Legal-size silicone release paper (8.5” x 14”) gives you extra length to work with. You can trim it down to letter size or use the full length for larger sticker sheet layouts. That extra two inches opens up a lot of design options.
What Common Mistakes Ruin Homemade Sticker Sheets?
The three most common mistakes are using the wrong backing material, setting blade pressure too high, and not laminating stickers intended for outdoor use. Each one is easy to avoid once you know what to watch for.
I’ve seen every variation of these mistakes play out in craft communities, and they almost always come down to rushing or skipping a step:
Problem: Stickers won’t peel cleanly from the sheet. Fix: Your backing material is wrong. Switch to proper silicone release paper. The silicone coating is what creates the nonstick release surface. According to the Forest Products Laboratory (U.S. Department of Agriculture), silicone coatings reduce surface adhesion by up to 95% compared to uncoated paper surfaces.
Problem: Stickers tear when peeling. Fix: Your kiss cut went too deep. The blade cut into the backing, creating a weak point. Re-test your blade depth on scrap material. Also check that your vinyl isn’t too thin - budget vinyl under 3 mil tears easily regardless of cut quality.
Problem: Colors look different printed versus on screen. Fix: Calibrate your printer and use ICC profiles for your specific vinyl. Matte vinyl absorbs ink differently than glossy. Most vinyl manufacturers provide downloadable ICC profiles on their websites.
Problem: Stickers curl after a few days. Fix: This happens when the vinyl and backing have different moisture absorption rates. Using a moisture-stable backing like silicone release paper (which doesn’t absorb moisture) eliminates curling. TAPPI (Technical Association of the Pulp and Paper Industry) research confirms that dimensional stability in coated papers depends heavily on the barrier properties of the coating layer.

Shop Sticker Making Supplies
Ready to make your own professional sticker sheets? Kraft & Kitchen carries the silicone pads and craft mats and PTFE sheets that sticker makers rely on for clean, consistent backing. Our silicone release paper comes in both letter and legal sizes - thick enough to feel professional, coated for a perfect peel every single time.
Browse our diamond painting accessories for storage jars and tools that also work great alongside sticker projects to find the right backing material for your sticker sheets.
So whether you’re making sticker sheets for fun, for gifts, or to sell at markets, the process is the same: good designs, clean kiss cuts, and proper release paper backing. That trio is all it takes to go from “I made this” to “wait, you MADE this?” And that reaction - from customers, friends, or yourself peeling the first perfect sticker off a sheet you built from scratch - never gets old!
Related reading: If you’re also exploring vinyl sticker durability, check out our guide on why vinyl stickers peel and how to fix it. And for choosing the right release paper type, we’ve got a detailed comparison of every backing option on the market.