You just placed the last drill on a 40,000-piece diamond painting. Your back hurts, your tweezers have permanent finger grooves, and you've got a masterpiece that deserves better than being rolled up in a tube under the bed. I know because I've been there - staring at a finished piece wondering how on earth you turn a floppy, sparkly canvas into something you'd actually hang on a wall.
The good news? Framing diamond paintings isn't hard. But there are a few things you can mess up badly if nobody warns you. So let me be that person.
Should You Seal Your Diamond Painting Before Framing?
Short answer: probably yes, but it depends on your setup.
Sealing locks the drills in place so they don't pop off over time. If you're using a frame with glass or acrylic that presses against the surface, sealing is less critical because the cover holds everything down. But if you're doing a stretched canvas mount with no cover, seal it. Trust me on this.
There are two main options. Brush-on sealant gives you a glossy or matte finish and really cements those drills. The downside is it can dull the sparkle a bit, especially matte versions. Spray sealant is lighter, preserves more shine, but gives less hold. I've used both, and for pieces I actually care about, I go brush-on.
Pro Tip: Before you seal the whole thing, test on a small corner. Some sealants react differently with certain drill types, and you don't want to discover that on your centerpiece. Also, make sure your canvas is completely flat first - use your release paper as a protective layer and press with heavy books for 24 hours.

What's the Best Way to Frame a Diamond Painting?
You've got three real options here, and which one works depends on your budget, the size of your piece, and how fancy you want to get.
Option 1: Standard picture frame. This is the simplest approach. You trim the excess canvas, mount it on foam board or cardboard backing, and pop it into a regular frame. Works great for smaller pieces (under 30cm). The key is getting a frame deep enough - diamond drills add about 2-3mm of height (the Picture Framing Magazine recommends at least 4mm clearance for textured art), so those super-thin gallery frames won't work. Look for frames with at least 5mm of depth between the glass and the backing.
The trick with standard frames is the glass situation. Regular glass works fine, but it sits right on the drills and can flatten them slightly. Some people skip the glass entirely, which looks incredible because the drills catch light freely. But then you're dust-collecting forever. Anti-glare acrylic is the sweet spot if you can find it.
Option 2: Stretcher bars. This is what the serious diamond painters use. You stretch your canvas over wooden bars (same concept as a traditional painting canvas) and staple it on the back. No frame needed - it hangs directly on the wall with that modern wrapped-edge look.
Stretcher bars work best for large pieces because there's no size limitation like with pre-made frames. And the result looks seriously professional. The catch? You need the canvas to have enough excess border to wrap around the bars. Most kits give you 3-5cm of extra canvas, which is barely enough. If yours is tight, this method gets stressful fast!
Option 3: Foam board mount. Budget-friendly and surprisingly clean-looking. You glue the painting flat onto foam board, trim it flush, and either frame it or hang it as-is with adhesive strips. This is my go-to for pieces I want to display quickly without spending $40 on a frame. The finished look is neat and tidy, and you can always upgrade to a proper frame later.

How Do You Flatten a Diamond Painting for Framing?
This is the step most people skip, and it shows. A wavy, bumpy diamond painting behind glass looks terrible. Like someone shrink-wrapped a bag of marbles.
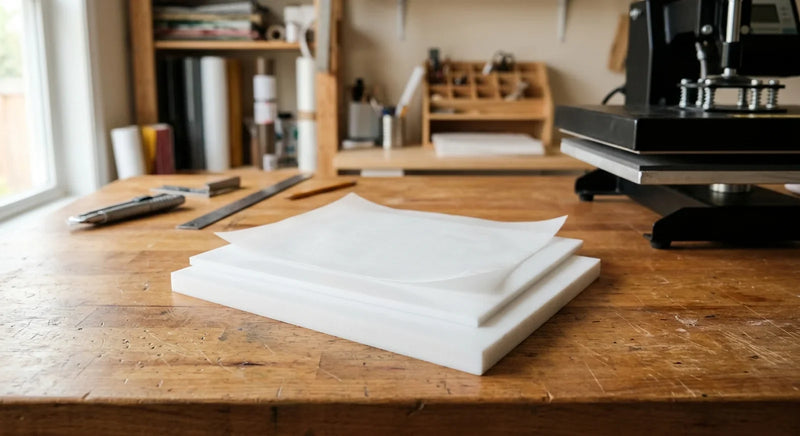
Here's what works. Lay your finished painting drill-side down on a clean, soft surface. I use a folded towel. Place a sheet of silicone release paper over the back of the canvas to protect it, then stack heavy books on top. Leave it for 24-48 hours.
Why release paper and not just any random sheet? Because regular paper can stick to adhesive that's seeped through the canvas. Silicone paper won't bond to anything - that's literally its job. I learned this the hard way when newspaper print transferred onto the back of a piece I'd spent three weeks on. Fun times.
For really stubborn curves (especially on rolled canvases), you can use a warm iron on the lowest setting. Iron the BACK of the canvas only, with release paper between the iron and the canvas. Quick passes, no lingering. The gentle heat relaxes the adhesive just enough to let the canvas flatten. And no, the drills won't melt - they're resin, not butter.
Can You Frame Diamond Paintings Without Glass?
Absolutely, and a lot of people prefer it.
Without glass, your drills catch ambient light and sparkle the way they're supposed to. The whole point of diamond painting is that 3D light-refracting effect, and glass (especially non-specialty glass) dampens that. So if sparkle is your priority, skip the glass.
But here's the tradeoff. Without glass, dust settles between the drills. Over time, the painting gets dull. In a bedroom or low-traffic area, this takes months to become noticeable. In a kitchen or near an exterior door? Weeks.
My compromise: I frame pieces in high-traffic areas with glass, and pieces in bedrooms or offices without. For the glass-free ones, I hit them with compressed air every month or two. Takes 30 seconds and keeps them sparkling.
If you sealed your painting well, the no-glass option is even more viable because the sealant fills the tiny gaps between drills where dust likes to hide. So sealing isn't just about holding drills in place - it's dust prevention too!
What Size Frame Do You Need for Diamond Paintings?
This trips people up because diamond painting dimensions are listed as the printable area, not the total canvas size. Your 30x40cm painting probably has a canvas that's 36x46cm or larger, depending on the manufacturer.
Measure the actual drill area, not the canvas. That's your image size. If you want a matted look (which I strongly recommend for anything you're proud of), add the mat border width to each side. A standard 2-inch mat on a 30x40cm painting means you need a frame for roughly 40x50cm.
For stretched canvas mounts, measure the drill area and buy stretcher bars that match. And buy them slightly undersized rather than oversized - you can always pull canvas tighter, but you can't add canvas that isn't there.
Quick frame shopping tip: craft stores regularly run 50% off sales on frames. Never pay full price. I've framed pieces for $8 that look like they cost $60. Patience pays.
How Do You Hang Diamond Paintings Properly?
Framed diamond paintings are heavier than regular prints because of all those little resin drills. A 40x50cm piece in a frame weighs roughly 2-3kg (4-7 lbs). The Fine Art Trade Guild suggests using D-rings for anything over 2kg. That's not crazy heavy, but it's enough that those tiny nail-and-hook combos from the dollar store aren't going to cut it.
Use proper picture hangers rated for the weight, or better yet, use two hooks spaced apart for stability. For stretched canvas pieces, sawtooth hangers on the back work perfectly.
And here's a display tip that makes a huge difference: lighting. Diamond paintings are designed to refract light. A small picture light or even an angled desk lamp above your framed piece transforms it from "nice craft project" to "wait, where did you buy that?" Seriously, the difference good lighting makes on diamond art is dramatic.

For the gallery wall look, mix sizes. One large centerpiece (40x50cm or bigger) flanked by two smaller pieces creates a professional arrangement. Keep spacing consistent - about 5-7cm between frames. And use a level. Nothing kills the vibe faster than a crooked diamond painting. We're going for "curated art collection," not "earthquake aftermath."
Shop Diamond Painting Supplies
Getting ready to frame? Our silicone release paper is essential for the flattening step - the true silicone coating means zero sticking to adhesive or drills. Grab a pack of precut squares for quick protection during ironing and sealing. And browse our full diamond painting accessories collection for everything from storage jars to workspace protection.
Now go frame that masterpiece. It didn't take you 47 hours just to live in a drawer.