You've finished three diamond paintings. You're working on four more. Your spare drills are in a plastic bag, your empty canvases are leaning against a wall, and your applicators are somewhere in a drawer. Sound familiar? Storage becomes the real problem once you're past beginner status. The Library of Congress preservation guidelines recommend acid-free storage materials for long-term protection of valuable art and documents. Research from Princeton University shows that clutter competes for your attention and reduces focus - another reason to keep your craft space organized.
I didn't start thinking about storage until I had six unfinished projects and nowhere to put them. At that point, I realized that organization isn't about having a perfect craft room. It's about being able to find what you need when you need it, without buying a hundred new containers.
How Do You Organize Diamond Drills Effectively?
Here's what most people do: they keep drills in the compartments they come in. For one or two paintings, this works. Once you hit four paintings, you've got fragments everywhere. You've got leftover drills from finished projects, partial colors from incomplete ones, and no system.
The solution is sorting by color rather than by project. This means buying containers that let you organize across your entire collection. Glass jars are my top choice. They're durable, you can see what's inside without opening them, and they stack or line up on a shelf.
Label everything. Use small adhesive labels with the color number or a color dot that matches what's inside. This takes 20 minutes per painting but saves hours when you're looking for a specific shade.
Find the right containers in our glass jars and storage collection.
Small plastic compartmented boxes also work well. They're cheaper than jars and take up less space. The downsides are you can't see inside without opening them, and they can be fragile. But if you're stacking them in a closet, they work fine.
Some people use pill organizers or bead organizers. These have tiny compartments and work great for storing completed paintings or for keeping extra drills on hand. They're not ideal for a full collection but they're perfect for 1-2 paintings in progress.
What doesn't work: plastic bags. Drills roll around, colors mix, and you'll spend time sorting them every session. Bags are temporary storage, not a real system.
How Do You Store Canvases So They Stay Protected?
In-progress canvases need protection but also need to be accessible. The worst approach is leaving them exposed where dust settles and your applicator picks up debris.

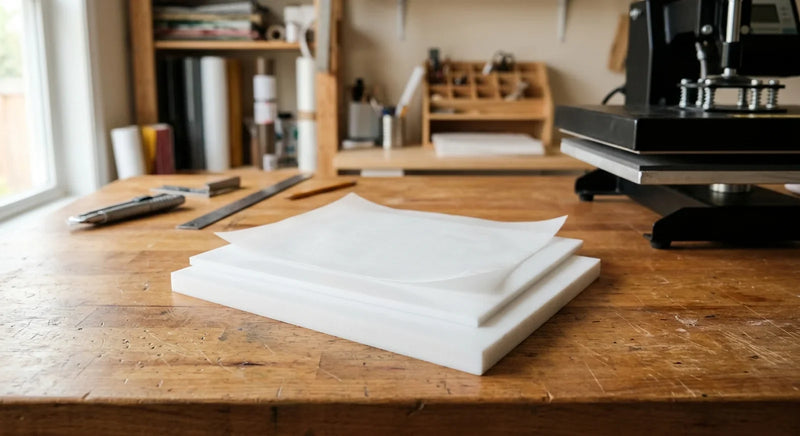
If your canvas has the release paper still attached (which I recommend), you can stack them flat in a drawer or a flat plastic storage container. The release paper protects both sides. Just make sure nothing is pressing down on them so hard that the drills deform.
For finished canvases waiting to be framed or displayed, a flat storage system works best. A shallow plastic bin, a document storage box, or even a large flat file cabinet drawer. The key is flat storage, not rolled or bent.
Get all your projects organized with our craft storage solutions.
If you have multiple projects in progress, a filing system works surprisingly well. Use clear plastic sleeves or sheet protectors and organize by project number or by completion percentage. It's weird but effective. You can see all your projects at once and know exactly what stage each one is in.
Some crafters use photo storage boxes with dividers. Each divider is a project. The canvas lies flat, the drills are in the sections, and everything is contained. This system scales well. You can expand from three projects to ten without changing your approach.
Where Should Your Applicators, Wax Pads, and Extras Go?
Your applicators will multiply. You'll have the original, a backup, maybe a fancier ergonomic one. Keep them in a cup or a small box at your workspace. Mark each one somehow so you know which is which if one goes missing.
Wax or sticky pads also deserve their own space. They get dirty, they lose stickiness, and you'll need replacements. Keep them together. As soon as one stops working well, swap it out and clean or replace it.
Tweezers, picks, and small hand tools go in a small drawer or a utensil organizer. These aren't essential but once you have them, you don't want to hunt for them.
Complete your toolkit with our diamond painting accessories.
Magnifying glasses, light pads, and other bulkier items deserve their own shelf or section of a cabinet. They're used less often but crucial when you need them.
What Color Reference System Actually Works?
Print a color reference for each project and store it with the canvas. Use a plastic sleeve or laminate it if you're worried about spills. This way, when you return to a project months later, you have the reference right there.
Some people create a simple photo system. Take a clear photo of each drill color, print a small color swatch, and keep it attached to the drill container with tape. It takes an hour to set up but pays off immediately.
Digital organization also works. Keep a photo of your color reference in your phone. This lets you match colors when you're at the store buying supplies or when you're working remotely.
How Do You Set Up Storage for Active Projects?
Keep 1-2 active projects on your work surface or in a designated project box right at your workspace. This prevents you from digging through storage every time you want to work.
Use a rolling cart or a small shelf unit right next to your crafting table. Your current project sits on top, your backup project sits below, and your drills are organized on the shelves. When you finish a project, roll in the next one.
Wall-mounted pegboards or magnetic strips work great for hanging applicators, light pads, and frequently used tools. This keeps them accessible and off your work surface.
A small caddy or supply box holds everything you need for the next 2-3 hours of work. All drills for the current project, your applicator, your reference image, everything. Grab the caddy when you sit down. When you get up, the caddy keeps everything together.
Set up the perfect workspace with our craft storage and organization solutions.
How Do You Store Finished Diamond Paintings Long-Term?
Once a painting is completely done and you're happy with it, you might want to store it until framing. The best approach is flat storage in a clean, dry place. A shallow plastic bin in a closet works perfectly.

Label the bin with photos of what's inside. This takes one minute but saves you opening five bins to find the one you want.
Add a desiccant packet if you live in a humid climate. This keeps the resin drills protected.
For really valuable or heirloom paintings, archival storage in acid-free paper and boxes is worth the investment. These paintings are going to last decades, so treating them like heirlooms makes sense.
How Do You Scale Storage as Your Collection Grows?
Start simple. Containers for your drills, a storage box for canvases, a cup for applicators. Once this system is full, you'll know what's missing or what could be better.
Don't buy an entire storage system upfront. Buy what you need now, see how it works, then expand. Most people overshoot and end up with empty containers.
The sweet spot for most serious amateur diamond painters is: 10-15 glass or plastic containers for drills, a shallow storage bin for canvases, one small organizer for tools, and one work caddy for active projects. This covers dozens of paintings!
Shop Diamond Painting Storage
Get your diamond painting collection organized with our glass jars and containers for drill storage and our diamond painting accessories for everything else. Your drills deserve a real home!
Got More Diamond Painting Storage Questions?
Q: Can I store unfinished paintings for months without damage? A: Yes, as long as the release paper is still attached. The adhesive stays workable. I've picked up projects from six months ago and they were fine. Without release paper, the adhesive can dry out or get sticky in ways that make it harder to work with.
Q: Are glass jars better than plastic containers for drill storage? A: Glass jars let you see what's inside without opening them, they're durable, and they look better on display. Plastic is cheaper, lighter, and takes up less space. Pick based on your priorities. I use both.
Q: How do I prevent dust from settling on my finished paintings? A: Store them in closed containers, even if temporary. A plastic bin with a lid, a shallow drawer, or a storage box. Once they're framed or displayed, regular dusting is fine.
Q: Should I separate drill colors from different paintings or mix them? A: Mix them. You'll use the same colors across projects. Once a color is complete in one project, you might use those extras in another. One organized collection is better than five separate ones.
Q: What's the best storage for applicators I'm not using? A: A cup or small box at your workspace. Keep them where you can see them so you remember you have backups. Applicators don't deteriorate in storage, so a drawer works fine too.
Q: Can I store diamond paintings in a hot garage or attic? A: Not ideally. Heat can make the adhesive stickier or potentially cause the resin to deform. A climate-controlled closet, shelf, or under-bed storage is better. If heat exposure is unavoidable, make sure the release paper is still attached.