I've watched a lot of people open their first diamond painting kit and freeze. Not because it's hard, but because they're holding a canvas covered in adhesive and have no idea what comes next. I did the same thing about five years ago, and I've learned that the difference between loving diamond painting and hating it comes down to one thing: you need the right setup. The American Academy of Ophthalmology recommends the 20-20-20 rule: every 20 minutes, look at something 20 feet away for 20 seconds. According to the Mayo Clinic, proper desk ergonomics prevent neck and back pain during extended seated work.
This isn't about having every gadget on the market. It's about understanding what each tool actually does and why some things matter way more than others.
What's Actually in Your Diamond Painting Kit?
Let's start with what you're buying. A diamond painting kit contains a canvas coated with a sticky adhesive base, a pile of colored resin diamonds (called drills), a pen-like applicator, and usually some kind of tray. You'll also get release paper, which is critical and I'll explain why.
The canvas itself is printed with symbols that correspond to specific drill colors. The symbols are your map. Your job is to pick up each diamond with the applicator and place it on the sticky area. Sounds simple because it is, but the quality of what you're working with matters.
Check out our diamond painting supplies to make sure you are starting with quality materials.
The adhesive on the canvas deteriorates over time, especially in heat or direct sunlight. This is actually why release paper exists. That protective layer keeps your canvas fresh while you're working and stores properly afterward. I'll come back to this because it changes how you approach storage.
How Do You Set Up a Diamond Painting Workspace?
Diamond painting requires better lighting than you think. Your eyes are doing detail work, and poor lighting leads to eye strain. I learned this the hard way. Get yourself a desk lamp with adjustable brightness, preferably with some warmth to it. Cold, harsh lighting makes everything look different and you'll waste time second-guessing colors.

Your work surface matters too. You need something flat, smooth, and large enough that your canvas doesn't hang off the edge. A desk works, but a dedicated table gives you room to spread out. This is important because you'll want your tray nearby, your water cup away from your workspace (trust me!), and space to rest your hand while you work.
Organize your creative space with our craft storage solutions.
Protect your surface. Use a silicone mat or a smooth piece of material under your canvas. The adhesive can stick to certain materials and you don't want your table getting damaged. This is also practical because if you spill water or drop something, the mat takes the damage instead of your furniture.
Keep your diamonds sorted and accessible. A small tray with compartments works, but the applicator comes with one anyway. The real issue is keeping completed sections protected. Once you've finished an area, cover it with something so you don't lean your hand on the wet adhesive and mess up your work.
Which Diamond Painting Accessories Actually Help?
Not every accessory is essential, but some change the entire experience. The applicator that comes with your kit usually works fine, but investing in a better one with an ergonomic grip matters if you're painting for hours. Your hand will thank you.
A wax or sticky pad is where you pick up your drills. Most kits include one, but it gets dirty and loses stickiness. Having a backup or replacing it matters. Some people use painter's tape rolled sticky-side-out, which works in a pinch.
A light pad isn't essential but it helps. It sits under your canvas and illuminates it from below, making the printed symbols clearer and reducing glare. This is especially useful for complex patterns or low-vision crafters.
Browse our diamond painting accessories for tools that make a real difference.
The tool I use most is actually a magnifier. You don't need anything fancy. A simple 2x or 3x magnifying glass hangs from my neck or sits on my table and I use it constantly. It reduces squinting and means your neck doesn't get sore from leaning in.
Drill picks and tweezers seem useful but I rarely use them. The applicator is designed to do this job. Where tweezers help is fixing mistakes. If you place a drill wrong, tweezers let you pull it out without damaging the canvas.
Why Isn't Release Paper Optional?
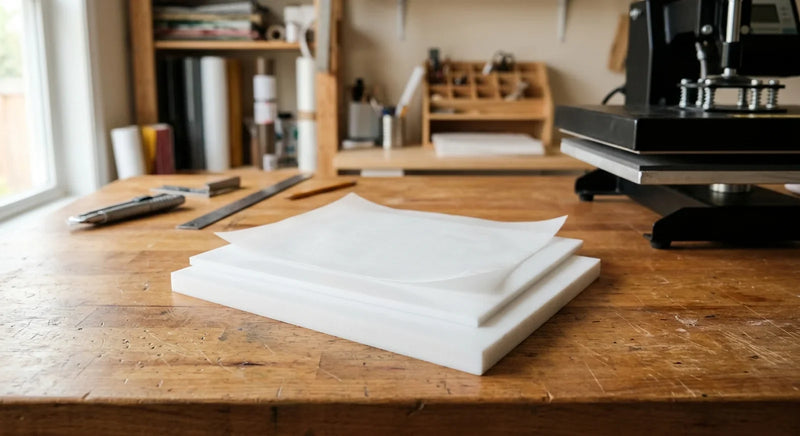
Here's what made the biggest difference for me: understanding that release paper is a protective layer, not just packing material. The paper keeps your canvas from drying out while you're in the middle of a project. When you take a break and set your canvas down, that release paper prevents the exposed adhesive from getting contaminated or crusting over.

Some people remove the release paper all at once. Bad idea. I remove it in sections as I work. This keeps the adhesive fresh and workable. It also means if I mess up a section, I can still add drills to it.
Get high-quality release paper that protects your canvas between sessions.
After you finish, the release paper lets you store your project safely. The diamonds are pressed into the adhesive but the back remains protected. If you're framing your work later, this matters because dust and debris won't stick to the back.
Release paper also teaches you something important about adhesive surfaces. The more you understand how release layers work, the better you become at protecting your projects during storage and handling.
How Do You Start Your First Diamond Painting Session?
Start small. A 5-inch by 7-inch painting, not a 16-by-20. You'll learn the rhythm without commitment. Set up during daytime so you have natural light plus your desk lamp. Keep your release paper on until you're about halfway done. Protect your workspace with a mat.
Have your reference colors nearby. Some people put drills in a photo of the color guide from the kit. Others use a color chart printed out. Whatever system you use, reference it constantly. Color matching is the skill that improves with practice.
Take breaks. Seriously. Diamond painting is satisfying but repetitive. Work for 30 minutes, look away, rest your eyes. This isn't laziness, it's protecting your vision.
Find everything you need in our complete diamond painting collection.
What Mistakes Do First-Timers Make?
The biggest mistake is working too fast. You'll place diamonds in the wrong spots, miss spots, or create uneven coverage. Slow down. The drills should sit flush against each other with no gaps. If they're not, press them down more firmly.
The second mistake is removing all the release paper at the start. You've learned why this is bad. The third is not protecting your canvas. Once you finish a section, cover it with something so your hands and forearms don't contaminate your work.
Don't use water anywhere near your diamonds. Seriously. They're resin and if they get wet, you'll have problems. Keep drinks far away from your workspace! I keep mine on a separate table.
The final mistake is choosing the wrong size for your first project. I know a 40-inch canvas is tempting. It's really not. You'll get bored halfway through. Choose something you can finish in 5 to 10 hours. That's your first painting.
What Workspace Layout Actually Works?
Position your light source in front of you, about 18 inches away. You don't want it creating shadows on your canvas. Your drill tray goes to the right if you're right-handed, left if you're left-handed, and at the same height as your canvas.
Keep your water cup behind your canvas, out of arm's reach while you're actively painting. This sounds paranoid but I've seen good work ruined by a spilled glass. Keep a roll of paper towels at your workspace. Spills happen.
If you're working on a table rather than a desk, adjust your chair height so your elbows rest at 90 degrees. Working with your arms stretched or twisted leads to shoulder and back pain. Comfort matters because diamond painting should relax you, not leave you sore.
Your reference image or color guide should be at eye level so you're not constantly looking down or up. Tape it to something vertical near your workspace.
Shop Diamond Painting Supplies
Starting your diamond painting journey? Browse our diamond painting accessories for quality tools and our release paper collection to protect your canvas between sessions.
Got More Diamond Painting Setup Questions?
Q: Do I really need a special diamond painting applicator or will a toothpick work? A: A toothpick is tiny and hard to control. The applicator that comes with your kit is designed for this job and actually works well. If your hands are large or you have grip problems, investing in an ergonomic applicator makes sense. But the basic one? It's fine.
Q: How long can I leave a canvas with release paper on? A: Months, really. The adhesive stays workable under the release paper. I've left half-finished projects for weeks and picked them back up without issues. The paper protects the sticky surface and keeps everything fresh.
Q: Can I work on my diamond painting while watching TV? A: Technically yes, but you'll make mistakes. Your eyes need to focus on the color reference, then on the canvas, then on placing the drill. If your attention is divided, you'll place wrong colors or miss spots. I recommend diamond painting as an activity where you're present, not multitasking.
Q: What's the minimum lighting I need? A: Natural daylight plus a desk lamp is the gold standard. If you only have artificial light, make sure it's bright enough that you don't have to lean in to see the symbols clearly. I'd recommend at least 500 lumens from your desk lamp.
Q: Do I need to seal or protect finished diamond paintings? A: Not immediately. The drills are secure in the adhesive. If you're framing your work under glass, you don't need extra protection. If it's going on a wall without glass, dusting it occasionally is enough.
Q: Should I remove the release paper once I finish? A: That's personal choice. Some people leave it on for storage and protection. Others remove it so they can see the finished work clearly. If you're framing it, leaving the paper on keeps the back clean. If you're displaying it without a frame, removing it lets you see everything.