Here’s something that surprises most people about diamond painting: it’s not actually painting. And it’s not really about diamonds, either. It’s closer to a cross between a mosaic and a color-by-number, except instead of ceramic tiles or crayons, you’re placing tiny faceted resin pieces onto an adhesive canvas. The result? A sparkly, textured piece of art that looks impressive on a wall.
I picked up my first kit about three years ago, mostly because I needed something to do with my hands while watching TV. Two hours later, I’d finished a quarter of a small canvas and was completely hooked. The meditative rhythm of pick, place, pick, place is seriously addictive. But that first project also taught me everything I was doing wrong, which is exactly why I’m writing this guide.
By the end of this tutorial, you’ll know how to set up your workspace, understand what’s in your kit, work through your first canvas efficiently, and avoid the mistakes that trip up almost every beginner.

What You’ll Need (And What’s Already in Your Kit)
Most diamond painting kits come with the basics: a printed adhesive canvas, bags of resin drills (that’s the official name for the little “diamonds”), a pen-style applicator tool, a tray for sorting drills, soft wax or gel to help the applicator pick up drills, and sometimes tweezers.
Diamond painting is a mosaic art form where tiny resin rhinestones (called drills) are placed onto a pre-printed adhesive canvas to create a sparkling, textured artwork similar to cross-stitch or paint by numbers.
That said, the included tools are usually pretty bare-bones! Here’s what I’d actually recommend having on hand:
- The kit itself (obviously)
- A flat, clean workspace - a table that’s at least 60 x 40 cm works well
- Good lighting - this matters more than you think, especially for distinguishing between similar colors like dark blue and navy
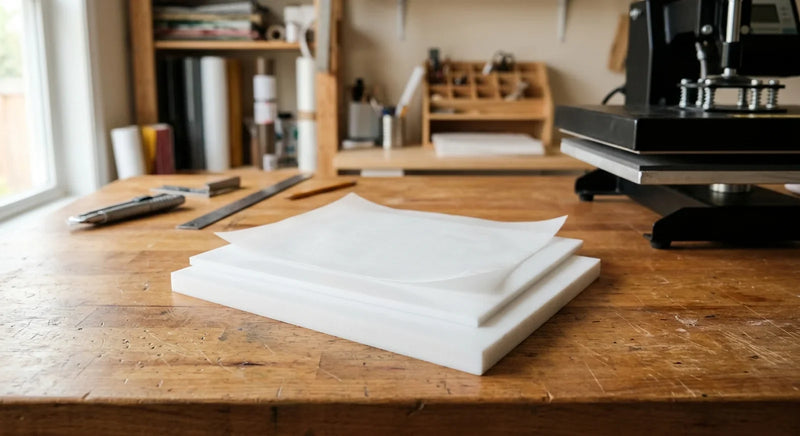
- A professional release paper or cover sheet to protect exposed adhesive areas
- Small containers or bags for sorting drills by color code
- Optional but helpful: a light pad, which sits under your canvas and makes the symbols way easier to read
How Does Your Diamond Painting Canvas Work?
When you unroll your canvas for the first time, you’ll see a grid of tiny symbols printed on a sticky surface, covered by a protective film. Each symbol corresponds to a specific drill color. Somewhere in your kit (usually a separate sheet or printed along the edge of the canvas), there’s a legend matching symbols to the numbered drill bags.
There are two types of drills you’ll encounter:
Round drills are shaped like small circles. They’re more forgiving to place because they don’t need to align perfectly. Great for beginners. They do leave tiny gaps between each piece, but from a normal viewing distance, you won’t notice.
Square drills are, well, square. They fit together like a mosaic with no gaps, creating a fuller, more polished look. But they require more precise placement. If one drill is slightly crooked, the whole row can look off.
Most beginner kits use round drills, and I’d suggest starting there. You can always move to square drills once you’ve got the technique down.
How Should You Set Up Your Diamond Painting Workspace?
Roll out your canvas on a flat surface. If it’s been shipped rolled up, it might curl at the edges. You can flatten it by placing heavy books on the corners for 30 minutes, or by gently rolling it in the opposite direction.
Organize your drill bags by their code numbers. Some people pour them all out into a tackle box or pill organizer right away. I’d suggest a different approach for your first project: just pull out the colors you need for the section you’re currently working on. Less clutter, fewer mix-ups.
Set up your light source so it hits the canvas evenly. Shadows make it hard to read the symbols, and nothing kills your momentum like squinting at a canvas for 20 minutes trying to figure out if that’s a circle or a star.
Why Should You Start from One Corner Instead of the Middle?
This is where most beginners go wrong. It’s tempting to start with the most exciting part of the image - maybe the eyes on a portrait or the brightest flowers. Don’t. Start from one corner, and work your way across in sections.
Why? Because every time you peel back the protective covering, that exposed adhesive starts collecting dust. The more surface area you expose at once, the more dust accumulates, and dusty adhesive doesn’t hold drills well. Working in sections (roughly 5 x 5 cm at a time) keeps the rest of your canvas protected.
Peel back just enough of the cover to expose a small working area. If you’re using the original plastic film, fold it back carefully. If you’re using nonstick release material, you can cut it to size and reposition it easily, which makes this whole process a lot smoother.

How Do You Sort and Organize Your Drill Colors?
Here’s the actual process, and it’s simpler than it sounds:
- Press the tip of your applicator pen into the wax pad. You only need a tiny amount - just enough to make the tip slightly tacky. One press lasts for about 15-20 drill placements before you need to re-wax.
- Pick up a drill by pressing the waxed pen tip onto the flat top of a drill in your tray.
- Place the drill onto the matching symbol on the canvas. Press down gently. You don’t need to push hard - just make sure it’s seated flat.
- Repeat. A lot.
That’s it. Pick up, place down. The rhythm becomes automatic after about 10 minutes.
What Is the Best Technique for Placing Drills?
A few things that’ll save you frustration:
Tilt the tray. Give it a gentle shake, then tilt it at about a 30-degree angle. The drills naturally settle into the grooves with their flat side up, making them much easier to pick up. This alone saves a surprising amount of time.
Don’t press too hard. If you’re mashing drills into the canvas, you’re overworking it. A light press is all you need. The adhesive does the work.
Check your alignment periodically. Every 10-15 minutes, step back and look at your work from a distance. It’s easier to spot a misplaced drill from two feet away than with your nose 15 cm from the canvas.
Use the multi-placer for large single-color areas. Most kits include a tool that picks up 3 or 5 drills at once. It’s not great for detail work, but for filling in big background sections, it cuts your time significantly.
The Mistakes You'll Probably Make (and How to Avoid Them)
I’ve made all of these. Learn from my experience.
Exposing too much canvas at once. I already mentioned this, but it bears repeating. Dust and pet hair are your enemies. Keep unexposed areas covered.
Mixing up similar colors. Drill colors can look nearly identical under certain lighting. DMC 310 (black) and DMC 939 (very dark navy) have tricked me more than once. Always check the code number, not just the color you think you see.
Forgetting to seal the finished piece. Once you’re done, your drills are held on by adhesive alone. Over time, especially on wall-mounted pieces, they can start to loosen. A clear sealant (brush-on or spray) locks everything in place. I use a brush-on sealant because spray can pool in the gaps between drills.
Skipping the flattening step. When your project is finished, place it under heavy books or use a roller to press all the drills firmly into the adhesive. This creates a uniform surface and helps the sealant bond properly.

How Long Does a Diamond Painting Take?
This depends on the canvas size, your experience level, and how much TV you have to catch up on.
As a rough guide: a small canvas (20 x 30 cm) takes most beginners 4-8 hours total. A medium canvas (30 x 40 cm) might take 15-25 hours. Large canvases (50 x 70 cm and up) can take 40-80+ hours spread across weeks.
Don’t rush it. The whole point is the process. But most people work in 30-60 minute sessions, and there’s zero penalty for stopping and picking it back up later. Just make sure your working area is covered before you step away.
What Should You Do with Your Finished Piece?
You’ve got options, and some are better than others. The most popular approach is framing it. Standard picture frames work, though you’ll likely need a slightly deeper frame to accommodate the raised surface of the drills. Some craft stores sell frames specifically designed for diamond paintings - they’re worth the extra few dollars!
You can also mount it on a stretcher bar (the wooden frames used for canvas art) for a more gallery-like look. Or, if you’re already eyeing your next kit, just store the finished one flat and come back to displaying it later.
Whatever you choose, seal it first. Five minutes of sealing saves you from the heartbreak of drills falling off your finished masterpiece three months later.
Shop Related Products
Your First Project Won’t Be Perfect. That’s the Point.
Here’s what I wish someone had told me before my first diamond painting: you’ll probably place a few wrong colors. Your lines might not be perfectly straight. And that’s fine. From any normal viewing distance, small imperfections disappear into the sparkle of the drills.
The real skills - efficient sectioning, good lighting habits, tray technique - develop naturally over your first two or three projects. So pick a kit with an image you actually like, set up a comfortable workspace, and enjoy the process. The finished result will be better than you expect. And fair warning: you’re about to develop a very expensive hobby.