Here’s something nobody warns you about when you start working with resin: epoxy bonds to almost everything. Wood tables, plastic sheets, fabric, cardboard - if resin touches it and cures, you’re either scraping for an hour or buying a new surface. We’ve seen customers ruin kitchen tables, garage workbenches, and one particularly unfortunate antique desk.
But the fix is simple and costs a few dollars. Release paper - specifically silicone-coated release paper - creates a surface that cured resin won’t stick to. You pour, drip, and overflow all you want. When the resin cures, it peels right off. Your table stays clean.
But not all heat-safe release paper works the same way with resin. The type of coating matters a lot.

Why Resin Sticks to Everything (Except Silicone)?
Epoxy resin is an adhesive. That’s literally what it’s designed to do - bond surfaces together permanently. When you mix the resin and hardener, the chemical reaction creates cross-linked polymer chains that grab onto whatever surface they’re touching.
Release paper is a coated sheet material designed to protect adhesive surfaces and provide a non-stick barrier, commonly used in diamond painting as a cover sheet to protect the sticky canvas while working section by section.
Most materials have surface energy high enough for resin to bond to. Wood, metal, glass, most plastics, fabric, and paper all give resin plenty to grip.
Silicone is different. It has extremely low surface energy, which means resin can’t form strong mechanical or chemical bonds with it. The resin cures on the silicone surface, but it sits on top rather than bonding into it. Think of it like water beading on a waxed car - the liquid sits on the surface without soaking in.
This is why silicone molds work for resin casting. And it’s why silicone-coated paper works for workspace protection. The silicone coating creates that same low-energy barrier between the resin and whatever is underneath.
What Types of Release Paper Work Best with Resin?
Not every paper labeled “non-stick” actually works with resin. Here’s what you need to know about each type.
Silicone-Coated Release Paper
This is what you want for resin work. True silicone release paper has a layer of cured silicone applied to one or both sides of a base paper. The silicone coating is what prevents resin adhesion.
From what we hear from our customers, look for paper that’s specifically labeled as silicone-coated or silicone release paper. The coating should feel distinctly slick - noticeably different from regular paper. If you run your finger across it and it feels like normal paper with a slight sheen, it’s probably not truly silicone-coated.
Good silicone release paper handles 2-3 resin sessions before the coating starts to degrade. The first session, resin peels off perfectly. By the third session, you might notice slightly more resistance during peeling. Replace it when resin starts leaving residue behind.
Parchment Paper
Standard baking parchment paper has a thin silicone coating, which is why it works in the oven. Some crafters use it for resin work, and it does work in a pinch. But there are limitations.
Parchment paper is thinner than dedicated release paper, so it tears more easily when you’re trying to peel cured resin off. The silicone coating is also thinner, which means it wears through faster. One session is usually the limit.
The bigger issue: parchment paper curls. Resin is self-leveling, so it flows toward the lowest point on your work surface. Parchment paper that curls at the edges creates channels where resin pools and runs off your protected area onto your unprotected table. Kind of defeats the purpose.
If parchment paper is all you have, tape the edges down flat to your work surface. It’ll get you through one session. But for regular resin work, dedicated release paper is worth the small upgrade!
Wax Paper
Don’t use wax paper for resin. The soft paraffin coating melts slightly from the exothermic reaction during resin curing (epoxy generates heat as it hardens). Melted paraffin wax mixes into your resin, creating cloudy spots and weak areas in the cured piece. It also bonds the paper to the resin surface, leaving paper fibers stuck to your project.
In my experience, we’ve seen this mistake a lot. People grab wax paper from the kitchen drawer thinking it’s the same as parchment. It’s not. Wax paper is coated with paraffin wax. Parchment paper is coated with silicone. They look similar but behave completely differently with resin.
Plastic Sheeting
Cheap plastic drop cloths (the kind you buy at hardware stores for painting) seem like they’d work. Plastic is non-porous, right?
Problem is, most disposable plastic sheeting is made from polyethylene, which resin does bond to - weakly, but enough to make peeling messy. The plastic also wrinkles and bunches, creating an uneven surface that causes resin to pool in random spots.
High-density polyethylene (HDPE) sheets work better than thin drop cloths. Resin has a harder time bonding to HDPE. But they’re more expensive than release paper and harder to find in convenient sizes.

How Do You Set Up a Resin-Proof Workspace?
the best resin workspace. Based on customer feedback from hundreds of crafters, uses layers. Each layer has a job.
Start with your table. If you care about the surface (and you should), the first layer of protection should be a silicone mat. This handles the heavy lifting - heat protection from exothermic curing, cushioning, and a permanent non-stick base that you can wipe down and reuse for years.
On top of the silicone mat, lay your release paper. This is your disposable sacrifice layer. It catches drips, overflow, and the mess from mixing and pouring. When it’s saturated with cured resin, peel off the cured bits, flip the paper over or replace it, and you’re ready for the next project.
This two-layer system means your silicone mat stays relatively clean (extending its life), and your table has double protection in case anything makes it past both layers.
For the edges of your workspace, extend the release paper at least 15 cm beyond your project area on all sides. Resin drips travel further than you think, especially during pouring and when using a heat gun to pop bubbles. We recommend 20-25 cm of border for larger pours.
How Do You Use Release Paper During a Resin Pour?
There are a few techniques that make release paper more effective during actual resin work!
Tape the paper down. Resin is viscous but it flows, and if your paper shifts during a pour, you get resin on your table exactly where you were trying to protect it. Painter’s tape at the corners holds the paper in place without leaving residue on your mat.
Pour on the paper, not over the edge. If you’re filling silicone molds on the release paper, pour resin into the molds over the paper surface. Any overflow lands on the paper instead of your table edge. This sounds obvious, but in the middle of a pour when you’re focused on getting the resin level right, it’s easy to move a mold to the edge of your paper without noticing.
Let drips cure before cleaning. When resin drips onto your release paper, leave it alone. Trying to wipe up uncured resin just spreads it around and thins the silicone coating. Let it cure fully (24-72 hours for most epoxies), then flex the paper and pop off the cured drips. They come off clean as solid pieces.
Use the paper as a mixing surface too. Instead of mixing resin in a cup on a bare table, mix on the release paper. The inevitable drips from your stir stick land on a protected surface. Some crafters pour a small test batch directly on the release paper to check consistency and cure time before committing to a mold.

How Long Does Release Paper Last with Resin?
Dedicated silicone release paper handles 2-3 resin sessions for light work (small molds, jewelry, coasters) and about 1-2 sessions for heavy pours (large trays, river tables, thick coatings).
I've seen this mistake plenty of times - the variable is how much resin contacts the paper and how long it sits while curing. A few drips on the corner barely affect the coating. A full sheet covered in cured resin stresses the silicone layer more.
You’ll know the paper is spent when cured resin starts sticking instead of releasing cleanly. If you have to peel hard or the resin leaves residue on the paper, the silicone coating has worn through in that area. Replace the paper.
Legal-size release paper (8.5 x 14 inches) covers more workspace per sheet than standard letter size, which means fewer overlapping sheets and fewer gaps where resin can sneak through to your table. The extra 3 inches of length makes a noticeable difference in coverage.
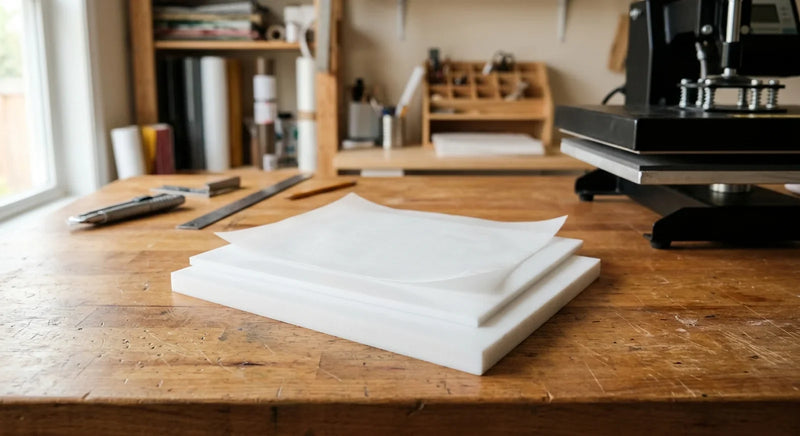
How Does Release Paper Compare to PTFE Sheets for Resin?
PTFE craft sheets also resist resin adhesion, but they solve a different problem than release paper.
PTFE is better for situations where you need chemical resistance over many uses. Lab work, industrial epoxy applications, and high-volume production benefit from PTFE’s durability (hundreds of uses vs 2-3 for release paper).
Release paper is better for typical craft resin work where you want a disposable surface you can throw away after a session. It’s cheaper per sheet, covers more area for the price, and you don’t have to clean it between uses - just toss it and lay a fresh sheet.
For most resin crafters doing jewelry, coasters, and small decorative pieces, silicone release paper is the practical choice. You get clean release, easy cleanup, and low cost per session.
Shop Related Products
What Is the Simple Takeaway?
Resin sticks to nearly everything. Silicone-coated release paper is one of the few things it doesn’t stick to. A few sheets of release paper over a silicone mat gives your table complete protection from resin pours, drips, and overflow.
Skip the wax paper. Skip the plastic sheeting. Use actual silicone release paper, tape it down, and let cured drips pop off on their own. Your table, your sanity, and your finished projects will all be better for it.