Your workspace setup determines about 80% of your diamond painting experience. Worth it. I'm not exaggerating. A good setup means you can paint for hours without neck pain, lost drills, or that frustrating moment when your canvas sticks to itself because you pulled back too much cover at once.
I've been refining my workspace for two years, and I've made every mistake possible along the way. Period. Here's what actually works - and what's a waste of money.
What Surface Do You Need for Diamond Painting?
You need a flat, stable surface at a comfortable height. Seems obvious, but I've seen people working on couch cushions and wondering why their drills won't set properly. A desk or table with good lighting access is ideal.

The surface should be large enough to hold your canvas flat with room on one side for your drill trays and tools. For most standard canvases (30x40cm), a 3-foot wide desk works. For larger canvases (50x70cm or bigger), you'll want at least 4 feet - or a drafting table that can handle the extra real estate.
Consider a slight tilt. Many diamond painters swear by a small easel or angled board that tilts the canvas toward you. This reduces neck strain significantly during long sessions. Even a 15-20 degree angle makes a noticeable difference. Some people use a large clipboard propped against a few books. It doesn't need to be fancy.
Why Does Your Cover Sheet Strategy Matter?
This is where most beginners go wrong. The plastic film that comes with your canvas works, technically. But it's clingy, hard to reposition, and tends to pull adhesive off the canvas when you remove it. After fighting with it for a few sessions, most people start looking for alternatives.
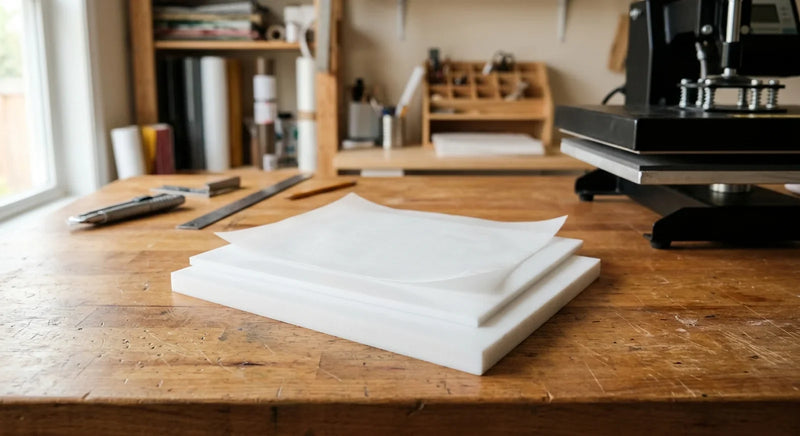
Silicone release paper is the upgrade that makes the biggest practical difference. It lies flat on the canvas without sticking to the adhesive, you can slide it around to expose exactly the section you're working on, and it protects the unworked areas from dust and pet hair. Cut it to size - a piece slightly larger than your canvas works perfectly.
And the key technique: work section by section. Peel back or slide the heat-safe release paper to expose a 3-4 inch strip, complete that section, then move the paper to expose the next area. This keeps the maximum amount of canvas protected while you work. The adhesive stays tacky much longer this way.
Pro tip: legal-size (8.5" x 14") professional release paper sheets are ideal because they're wide enough to cover most canvas widths in one piece. Letter-size sheets work for smaller canvases but you might need two pieces side-by-side for larger projects.
How Does Drill Organization That Actually Saves Time Affect Your Budget?
Most kits come with small plastic bags of drills labeled by color number. This is fine for small projects with 10-15 colors. For anything bigger - and especially for full-drill canvases with 30+ colors - you need a better system.
Small glass jars (5ml or 9ml) work brilliantly for drill storage. You can see the color without opening anything, they're easy to pour from, and they look way better than a pile of crumpled bags on your desk. Label each jar with the DMC number (or whatever color code your canvas uses) and arrange them in numerical order.
For the colors you're actively using in a session, pour small amounts into a multi-well sorting tray. Working from a tray is faster than opening and closing individual containers repeatedly. When you're done for the day, pour unused drills back into their storage jars.
One thing I wish someone had told me earlier: sort your drills by the areas of the canvas where they appear most. Instead of random order, group the colors that appear in the section you're currently working on. This eliminates the constant searching through 30 containers for the right color.
Why Does Lighting Make or Break the Experience?
Natural daylight is ideal but not always available, especially for evening sessions! You need a light source that provides even, bright illumination across your canvas without creating glare on the drill facets.

A daylight-spectrum LED desk lamp (5000-6500K color temperature) positioned above and slightly behind your work gives the best color accuracy. Avoid warm white lights (2700-3000K) - they make it harder to distinguish between similar colors, and that's where mistakes happen.
A light pad placed under the canvas is the other popular option. These illuminate from behind, making the color-coded symbols on the canvas much easier to read - especially on darker-colored canvases where printed symbols can be hard to see. Not strictly necessary, but helpful for detailed work and for anyone whose eyes get tired easily.
What Is the Minimal Toolkit You Actually Need?
The drill pen that comes with your kit works. Most are basic single-placer pens. For faster coverage on large single-color areas, a multi-placer tip (3 or 5 drills at once) speeds things up noticeably. These are cheap and most kits include one.
wax or putty for the pen tip. The tiny wax square in your kit runs out fast. Get a small container of diamond painting wax - it lasts for months and gives better drill pickup than the included squares.
A straightedge or ruler for aligning rows. When you're placing drills in long horizontal rows, a ruler laid along the row keeps everything straight. Slightly crooked rows are the fastest way to make a finished piece look amateur.
A small roller or flat tool for pressing down completed sections. After finishing an area, gently rolling over it seats the drills more firmly into the adhesive. Some people use a rolling pin, others use the flat side of a book. Anything that applies even, gentle pressure works.
That's it. You don't need the $50 accessory kits with tweezers and correction plates and seventeen different pen tips. A good pen, wax, a straightedge, a roller, proper release paper, and decent lighting. Everything else is optional.
Shop Related Products
What Setup Keeps You Coming Back?
The best workspace is one you don't have to set up and tear down every session. If you can dedicate a corner or a desk to diamond painting - where you can leave your canvas, drills, and tools in place between sessions - you'll paint more often. The activation energy of a full setup is what kills most hobbies.
If space is limited and you need to pack up, get a dedicated storage case or portfolio that holds your canvas flat (don't roll unfinished canvases - it loosens the drills). Keep your tools in a small pouch or pencil case so everything stays together.
A comfortable workspace where everything has a place isn't just nicer to look at. It makes the actual painting faster, more relaxing, and more enjoyable. And that's the whole point.
Related Reading
- Diamond Painting Storage Solutions: Organizing Drills, Supplies, and Finished Pieces
- How to Keep Your Diamond Painting Canvas Sticky While Working
- How to Choose the Right Size Glass Jar for botanical Storage