I’ve spent more money replacing lost diamond painting drills than I’d like to admit. Tiny little bags ripping open, drills scattering across the table, and that sinking feeling when you realize you’re short on DMC 310 halfway through a 50x70cm canvas. Sound familiar?
But the fix isn’t complicated, but it does require a system. After two years of trial and error (and a lot of wasted time picking drills off the carpet), here’s what actually works for organizing everything from loose drills to finished masterpieces.
Why Your Current Storage System Probably Isn’t Working?
Most diamond painting kits ship with those little resealable bags. They’re fine for maybe the first session. After that, they start tearing at the seals, drills slip through gaps, and you can’t see what’s inside without opening each one.
Diamond painting is a mosaic art form where tiny resin rhinestones (called drills) are placed onto a pre-printed adhesive canvas to create a sparkling, textured artwork similar to cross-stitch or paint by numbers.
The bigger problem is scale. One kit might have 30-40 colors. If you’re working on multiple projects or buying drills in bulk, you’re looking at hundreds of individual colors that need to stay separate, labeled, and accessible.
A proper storage system saves you three things: time searching for the right color, money replacing lost or mixed drills, and frustration when a project stalls because your workspace is chaos.

Why Are Glass Jars the Best Solution for Drill Storage?
I’ve tried bead containers, pill organizers, tackle boxes, and those multi-compartment plastic cases everyone recommends on Facebook groups. Glass jars beat all of them for a few reasons.
First, visibility. You can see exactly what’s inside without opening anything. This matters more than you’d think when you’re trying to find DMC 742 among 40 other yellows and golds.
Second, they seal properly. Small glass containers with screw lids don’t pop open in your craft bag, don’t crack when you drop them (well, usually), and keep dust out completely. The 5ml size is perfect for a single color from a standard kit. Bump up to 7ml or 9ml if you buy drills in bulk.
Third, durability. I’m still using the same set of glass jars I bought 18 months ago. The plastic organizers I started with? Replaced twice because the hinges broke and compartment dividers snapped.
Labeling tip: grab a set of DMC color code stickers or use a label maker. Stick the code on the lid so you can see it when the jars are stored upright. Some people attach the diamond painting drill card directly to the jar with a rubber band for absolute color matching.
How Do You Set Up a Drill Organization System That Scales?
Here’s the step-by-step process I use for every new kit:
Step 1: Before you even start painting, transfer all drill bags into individual glass jars. Yes, every single one. It takes about 15 minutes per kit, and you’ll thank yourself later.
Step 2: Label each jar with the DMC code from the legend sheet. Not the symbol - the DMC number. Symbols change between kits. DMC codes don’t.
Step 3: Group jars by color family. Reds together, blues together, neutrals together. I use a small craft tray with sections, but a simple shelf divider works too.
Step 4: Keep a master list. I track which DMC colors I've in stock on a sticky note inside my storage box lid. When I finish a project and have leftover drills, they go into my permanent collection instead of the trash.
This system means I’ve built up a backup stash of common colors over time. Running low on black (DMC 310) or white (DMC Blanc) mid-project used to mean ordering more and waiting days. Now I just grab from stock.
What About Workspace Setup: Keeping Active Supplies Within Reach?
Your active workspace is a different problem than long-term storage. When you’re mid-session, you need 5-8 drill colors plus your pen, soft wax, and trays within arm’s reach without cluttering the area.
I keep my current colors in a shallow tray next to the canvas. The jars sit upright so I can read the labels. Pen and soft wax go on the left (I’m right-handed), extra trays stacked behind the canvas.
The canvas itself sits on a large silicone mat. This serves double duty: the mat gives a slightly tacky surface that keeps the canvas from sliding, and any drills that escape your tray land on the mat instead of rolling off the table and onto the floor.
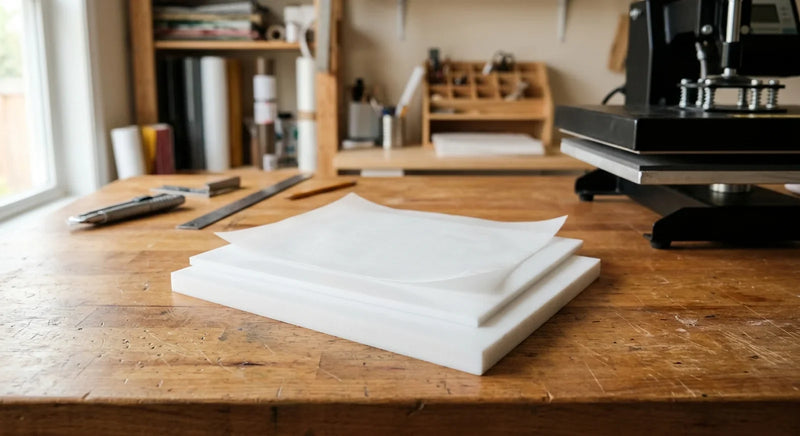
Release paper goes over any exposed sections of the canvas you’re not actively working on. This is non-negotiable. Dust, cat hair, crumbs - if it’s floating around your house, it’s landing on exposed adhesive. Silicone release paper is better than the original cover film because it lies flat, peels cleanly, and doesn’t pull up drills when you reposition it.

How Do You Protect Finished Diamond Paintings?
Here’s where most people drop the ball. You spend 40+ hours placing thousands of drills, and then the finished piece sits in a rolled tube or face-down on a shelf collecting dust.
Before sealing: make sure every drill is fully pressed down. Run a rolling pin or a heavy book across the surface with a sheet of nonstick release material between the book and the drills. This press step pushes any slightly raised drills into the adhesive.
Sealing options: most experienced painters use a brush-on sealant or spray sealant. The brush-on type gives you more control but takes longer. Spray works for full coverage but apply in light coats - heavy spray can pool between drills and create a cloudy look.
Storage between finishing and framing: place the painting face-up on a flat surface. Cover it with silicone release paper (not plastic wrap - plastic can stick and pull drills). If you need to store it rolled, roll it face-out around a cardboard tube so the drills stay on the outside of the curve. Face-in rolling puts pressure on the drills and can pop them loose.
For long-term unframed storage, sandwich the painting between two sheets of foam board with release paper protecting the drill surface. Store flat if at all possible.
How Do You Organize Supplies Beyond Drills?
Drills are the obvious storage challenge, but they’re not the only thing taking up space. Here’s how I organize the rest:
Pens and tips: one jar or small cup, tips in a separate container. Don’t mix multi-placer tips with single tips - they scratch each other.
soft wax and putty: store at room temperature away from direct sunlight. The small glass jars work great for this since they seal airtight. Cold soft wax gets hard and won’t pick up drills, and warm soft wax gets too sticky and leaves residue on the canvas.
Light pads: store flat, cord wrapped loosely. Don’t coil the cord tightly around the pad since this can create pressure points that eventually cause dead spots in the LED.
Release paper and cover sheets: keep flat in a large envelope or folder. Folding creates creases that can leave marks on your canvas adhesive. Silicone release paper can be reused for 2-3 projects, so don’t toss it after one use.
Leftover canvas and backing: if you save canvas scraps for testing or small projects, roll them loosely and label with the DMC colors used.
What Are the Best Budget-Friendly Storage Solutions?
You don’t need expensive craft organizers to have a functional system. Here’s what works at every budget:
Starter setup (under $20): A set of small glass jars for your current kit’s colors, a label maker or stickers, and one flat storage container for your pens and accessories.
Intermediate setup ($20-50): Enough glass jars for multiple kits (100+ jars), a tiered rack or drawer unit for jar storage, a large silicone mat for your workspace, and quality release paper for canvas protection.
Serious collector setup ($50-100): All of the above plus a dedicated craft cart or rolling storage unit, foam board and archival storage supplies for finished pieces, and backup drills in bulk for common colors.
The jars are the foundation of every level. I started with the basic setup and added pieces as my collection grew. And the key is starting organized from your first kit rather than trying to retroactively sort 10,000 loose drills from a year of unorganized crafting! Trust me on that one.
What Storage Mistakes Should You Avoid?
Don’t store drills in direct sunlight. UV exposure can fade colored drills over months, especially reds and purples.
Don’t use containers with snap-close lids for travel. They pop open. Screw-top jars or containers with locking latches only.
Don’t mix round and square drills in the same storage system without clear labeling. They’re not interchangeable and mixing them up mid-project is a nightmare.
Don’t stack finished paintings face-to-face. The drills will interlock and you’ll damage both pieces separating them. Always place release paper or foam board between pieces.
Don’t throw away your drill color legend cards. They’re the only reliable reference for matching DMC codes to the symbols used in that specific kit.
Shop Related Products
What Goes Where? A Quick Reference Guide
Active project drills: glass jars in your workspace tray, labeled by DMC code.
Backup and leftover drills: glass jars in a storage box, grouped by color family.
Finished paintings awaiting framing: flat storage, face up, covered with release paper.
Displayed pieces: framed behind glass or sealed and mounted.
Supplies and tools: one dedicated container or drawer, everything in its spot.
The whole point of organization is to spend more time actually painting and less time searching, sorting, and replacing. Get your storage right once and every project after that starts smoother and finishes faster.