The moment you unbox your first heat press, you're going to need more than just the machine. You'll need materials that work with it, tools that protect it, and supplies that let you actually finish a project. Most beginners spend on a press and then realize they're missing half of what they need. PTFE was originally developed by Chemours (formerly DuPont) and has been used in nonstick applications for decades. The CPSC burn prevention guide covers basic safety when working with heated equipment.
I've worked with heat presses long enough to know what's essential and what's marketing fluff. This checklist covers the material science side too, because understanding why something matters is the difference between good results and frustrated mistakes.
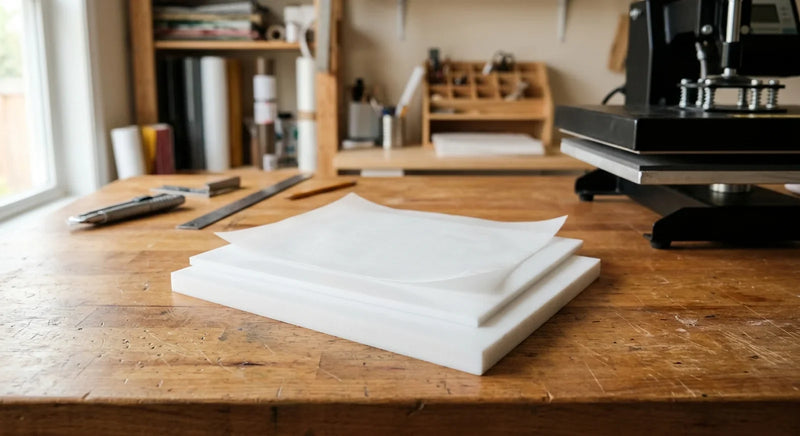
Why Aren't PTFE Sheets Optional for Heat Press?
PTFE is polytetrafluoroethylene, also known as Teflon. If you've never used heat presses, you might not realize how important this material is. When you press vinyl or other materials, you're applying heat and pressure. PTFE sheets sit on top of your material and protect your heat press from damage.

Think of PTFE as a sacrificial layer. Without it, heat-sensitive materials melt onto your press. With it, the material transfers clean and your machine stays pristine! Over time, your PTFE sheets will get marked, worn, and eventually need replacement. That's fine. They're designed to take that damage so your press doesn't.
PTFE thickness matters. Thinner sheets (around 0.5mm) are flexible and work for most projects. Thicker sheets (1-2mm) handle heavier pressure and last longer but cost more. For beginners, start with medium thickness.
Get durable PTFE rolls and sheets that last through hundreds of presses.
FEP (fluorinated ethylene propylene) is similar to PTFE but slightly different. It handles heat slightly differently and some people prefer it for certain applications. Most beginners don't need both. PTFE works for virtually everything.
How many sheets do you need? At minimum, two. One for your press, one drying or cooling. For active crafters, I'd recommend three or four. They wear out gradually and you don't want to be without one while a replacement arrives.
Keep your PTFE sheets clean. Residue builds up and reduces effectiveness. A soft cloth and water work fine. Don't use harsh chemicals or abrasive pads. The whole point is protecting your press, and damaged PTFE sheets don't protect anything.
What HTV Vinyl Types Should You Use and When?
HTV stands for heat transfer vinyl. It's the material that sticks to fabric when you apply heat and pressure. There are several types and they behave differently.
Standard permanent HTV is the basic choice. It's durable, washable, and works on most fabrics. It comes in glossy and matte finishes. For most projects, this is what you're buying.
Glitter HTV looks fancy but is trickier to work with. It requires careful pressure settings and peeling technique. The glitter particles are held on with adhesive, and too much heat or pressure can shift them. It's worth learning but not where you start.
Metallic HTV is similar to standard but with metallic flakes. It handles like regular HTV and looks premium. It's more expensive but not significantly harder to work with.
Flock HTV has a velvet-like finish. It requires specific heat and pressure settings and doesn't perform well on lighter fabrics. I'd skip this initially.
Reflective HTV is designed for safety gear. It reflects light, which is its whole purpose. It handles like standard HTV but you're paying for the reflective properties.
Browse our heat press supplies for vinyl, tools, and accessories.
Patterned HTV comes pre-designed with patterns, colors, or textures. It's more expensive and more limited in what you can do. Custom designs on standard HTV is more flexible.
Buy a few sample sheets of different types. Vinyl is cheap enough that experimenting teaches you more than reading. You'll learn why certain vinyl behaves certain ways and what your press can handle.
Storage matters. HTV can get sticky or tacky if it gets too hot. Store it flat at room temperature, away from direct sunlight. Don't leave it in a hot car or exposed room.
What Weeding Tools Give You the Precision You Need?
After heat transferring your vinyl, you need to remove the parts you don't want. This is called weeding. Your design is on the vinyl, everything else gets removed, leaving just your image on the backing.

A basic plastic weeding tool works fine. It's just a small lever with a sharp edge. The motion is gentle scraping and lifting. You're not prying hard, you're coaxing the vinyl away from the backing.
Metal weeding tools are sharper and more durable but risk tearing your design if you're not careful. I prefer plastic for detail work and metal for large straight edges.
Fine-tip weeding tools exist for detail work. If your designs have tiny letters or intricate pieces, a fine tip saves you time and frustration. Broad tips work for large areas.
Heat-resistant tweezers are useful but not essential. They let you pull away small vinyl pieces without burning your fingers. A metal tweezer works fine if you're careful.
Some people use an X-acto knife for weeding. This is precise but risky if your backing tears. Practice a lot before going this route.
Complete your tool setup with heat press accessories.
Invest in a basic set of three tools: a plastic scraper, a metal scraper, and tweezers. These handle 95 percent of what you'll do. You can upgrade once you know what you actually use.
Why Is Transfer Tape Your Secret Weapon?
Transfer tape is your secret weapon. After you remove the excess from your design, you press the vinyl onto transfer tape. The tape sticks to everything and becomes a carrier. You then apply the entire piece to your fabric, vinyl and transfer tape together. When it cools, you peel away the tape and your design stays behind on the fabric.
If you skip transfer tape, you'll struggle to get intact designs onto fabric. Pieces shift, details misalign, and your work looks sloppy. Transfer tape prevents this.
Standard clear transfer tape works for most vinyl. It's transparent so you can see your design as you position it. That makes all the difference!
Some vinyl comes with waxy or tacky backing. This is permanent adhesive. You still need transfer tape but the application is slightly different. The tape helps you move the design as a unit without pieces separating.
Pro tip: use low-tack transfer tape for delicate designs and medium-tack for standard applications. High-tack can tear your vinyl when you remove it.
Tape width matters. Standard is 12 or 24 inches. If you're doing small designs, 12-inch tape is fine. For larger projects, 24-inch tape handles them in one piece.
Apply transfer tape smoothly without wrinkles. A squeegee or credit card works. No bubbles, no problems! and can cause pieces to shift during pressing.
Store transfer tape flat, not rolled. It stays tacky better and doesn't wrinkle. Keep it out of direct sunlight.
What Else Goes on Your Heat Press Supply List?
Beyond the basics, you'll need:
A heat press protection mat or dedicated work surface. This protects your press from spills and keeps things clean.
Butcher paper or kraft paper. This goes between your fabric and your heat press platen to prevent shine and help with even heat distribution.
A pressing cover or Teflon sheet for the top of your press. This protects your upper platen from adhesive residue.
A temperature and pressure guide specific to your vinyl and fabrics. Different materials need different settings. Guessing leads to failure.
Quality fabric squares for testing. You'll destroy test pieces. Buy cheap cotton or poly-blend squares and use them to dial in your settings before pressing expensive items.
Heat-resistant gloves. Your heat press gets hot, obviously. Gloves protect your hands from accidental burns.
A timer or a press with a built-in timer. Precise timing is crucial. Off by 5 seconds and your results change.
A design software or access to designs. You need something to press. Cricut, Silhouette, or Adobe Illustrator are common choices.
How Should You Set Up Your Heat Press Workspace?
Your heat press needs a stable, level surface. An uneven table means uneven pressure and inconsistent results. Use shims or adjust your table to get it perfectly level.
Keep your workspace organized. Weeded designs go in one area, your fabric and backing go in another, finished pieces go in a third. This prevents mixing up stages.
Have good lighting directly on your heat press. You're working with small details and color matching. Poor lighting leads to mistakes.
Keep water nearby for cooling. After pressing, fabric is hot. Some people have a cooling station with a rack where pieces sit while they cool. This lets you stay productive instead of waiting.
Ventilation helps too. Vinyl can off-gas, especially when hot. A fan in the room or a window open makes the space more pleasant.
What Heat Press Mistakes Should You Avoid?
The biggest mistake is guessing at temperature and pressure instead of testing. Read the vinyl manufacturer's guidelines and your press manual. These settings exist for a reason.
The second mistake is pressing too long. Most vinyl only needs 15-20 seconds. Longer presses don't improve results, they ruin them. Set a timer and stick to it.
Not using PTFE sheets. This damages your press and your results. Always use protection.
Pressing directly onto multiple fabric layers without adjusting settings. A t-shirt with a tag underneath presses differently than a tag-less shirt. Account for this.
Peeling transfer tape too quickly. Let your pressed item cool slightly before peeling. Tape peeled while hot can take your design with it.
Using old or dried-out vinyl. Vinyl has a shelf life. Old vinyl doesn't adhere properly. If your stock is more than a year old and hasn't been stored properly, replace it.
Shop Heat Press Supplies
Building your heat press toolkit? Check out our heat press supplies for PTFE sheets, protective mats, and transfer accessories. Pair them with our PTFE rolls for long-lasting press protection!
Got More Heat Press Questions?
Q: How often do I need to replace my PTFE sheets? A: Depends on usage but typically every 3-6 months of regular pressing. As soon as you notice it's not protecting your press as well (residue staying on the platen or designs not transferring cleanly), it's time.
Q: Can I use parchment paper instead of PTFE sheets? A: Parchment paper has a lower melting point than PTFE. It works occasionally but will deteriorate quickly and can leave residue on your press. PTFE is the right choice and doesn't cost much more.
Q: What's the difference between transfer tape and packing tape? A: Packing tape will leave adhesive residue on your fabric and your press. Transfer tape is designed not to. They're not interchangeable.
Q: How do I know if my heat press is at the right temperature? A: Use a heat press thermometer on your platen. Some presses read high or low. Dial in the actual temperature with a thermometer, not just the setting on the machine.
Q: Can I press vinyl onto 100% polyester? A: Some vinyl works on polyester but many don't because polyester is slippery. Always test on your specific fabric first. Some people use a lower temperature and longer press time on polyester.
Q: What temperature should I press most HTV vinyl at? A: 300-330°F for 15-20 seconds is standard, but check the manufacturer's guidelines for your specific vinyl. Some specialty vinyl is different.