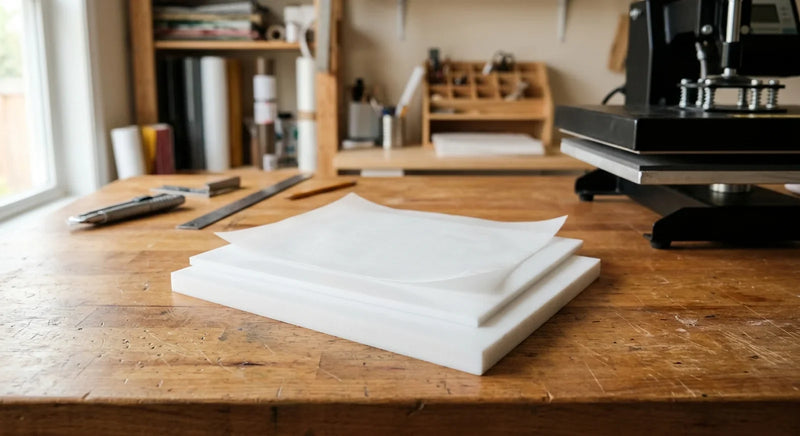
I’ve scorched more t-shirts than I’d like to admit. Burned vinyl, melted polyester, press marks that turned a custom birthday gift into a rag! Every single time, it came down to one of the same handful of mistakes. After years of heat pressing and way too many wasted blanks, I’ve got a pretty solid list of what goes wrong and why.
If your heat transfer vinyl keeps peeling, your sublimation prints look washed out, or you’re getting ugly press-through marks on the back of your garments, you’re probably making at least one of these seven mistakes.

Are You Using the Wrong Temperature for Your Material?
This is the number one mistake I see, and it’s the easiest one to fix. Every material has a specific temperature range, and guessing will cost you blanks.
A heat press is a machine that applies heat and pressure to transfer designs onto substrates like fabric, ceramics, and metal, commonly used with heat transfer vinyl (HTV) and sublimation printing for custom apparel and merchandise.
I keep a temperature cheat sheet taped to the wall next to my press. It’s saved me more times than I can count. Most heat press supplies come with general guidelines, but you should always do a test press on a scrap piece first. Always.
The real problem isn’t just too-hot or too-cold. It’s that people set one temperature and use it for everything. Cotton, polyester, nylon, canvas - they all need different settings. Treat your heat press like an oven, not a microwave. Temperature matters.
Is Your Pressure Actually Even Across the Platen?
Here’s something most beginners don’t check: pressure distribution. You crank down the handle and assume it’s good. But if one corner of your platen is making better contact than the other, you’ll get patchy transfers every time.
A simple test: close your press on a piece of paper, then try to pull it out from different edges. If it slides out easily from one side, your pressure is uneven. Most presses have an adjustment knob at the top - give it a quarter turn and test again.
Uneven pressure shows up as vinyl that peels from one edge, sublimation prints with faded corners, or HTV that looks perfect in the center but lifts around the edges. I chased this problem for months before someone in a crafting forum pointed it out. Took two minutes to fix.
Why Does Your Vinyl Keep Peeling After a Few Washes?
You pressed it, it looked great, you wore it once, washed it, and half the design came off. Sound familiar?
Nine times out of ten, this is a time problem, not a temperature problem. People rush the press. HTV typically needs 10-15 seconds of firm pressure, but the exact time depends on the brand and type. Glitter vinyl often needs longer. Stretch vinyl for athletic wear needs a lower temp but more time.
The other common culprit: not pre-pressing your blank. Garments hold moisture from manufacturing, shipping, and storage! That trapped moisture creates a steam barrier between the vinyl and the fabric. Five seconds of pre-pressing with no vinyl drives off that moisture and gives you a much better bond.
And here’s one more thing - let your project cool completely before peeling the carrier sheet if you’re using a cold-peel vinyl. I know it’s tempting to check your work immediately. But peeling hot when it says cold-peel will pull your design right off. Patience pays off with heat transfer vinyl projects.
Are You Forgetting to Protect Your Work Surface?
This is the mistake that makes me cringe the most because it’s so preventable. You press your design, flip the garment to press the back, and suddenly the vinyl from the front sticks to your lower platen. Or worse, the heat transfers ink from a previous project onto your new blank.
A PTFE nonstick sheet between your work and the platen solves this instantly. It prevents press-through, protects your platen from adhesive residue, and stops dye migration on polyester. I use one on top of my project and another on the bottom platen. Every time, no exceptions.

Some people use parchment paper, but it’s a one-and-done solution. Regular parchment starts breaking down after a single use at heat press temperatures. A quality PTFE sheet handles hundreds of presses before it needs replacing. The difference between silicone release paper and parchment comes down to coating quality and reusability - and that applies to heat press protection too.
The Specialty Graphic Imaging Association (now PRINTING United Alliance) recommends using a protective barrier sheet on every press to reduce garment defects and extend platen life. For home crafters, the difference is even more noticeable since consumer-grade presses tend to have thinner platen coatings than commercial equipment.
Is Incorrect Peeling Technique Wrecking Your Transfers?
Hot peel. Cold peel. Warm peel. Every vinyl type has a preferred peeling method, and ignoring it's a fast track to ruined projects.
Hot peel means you remove the carrier sheet immediately after pressing while everything is still warm. Cold peel means you wait until it’s fully cooled - room temperature, not just “not burning my fingers.” Warm peel falls somewhere in between.
The carrier sheet directions will tell you which method to use. But here’s what they won’t tell you: peel angle matters too. Always peel back at a sharp angle (close to 180 degrees, folding the carrier back on itself) rather than pulling straight up. Pulling up puts lifting force on the vinyl and can pull it right off the fabric, especially on textured materials like canvas bags.
I’ve seen people literally peel in one smooth motion like they’re unwrapping a gift. Slow and steady at a sharp angle. That’s the move.
Are You Ignoring How Fabric Color Affects Your Results?
This one catches people off guard. You test your design on a white tee, it looks incredible, then you press the same settings on a dark navy shirt and it’s a disaster.
Dark fabrics absorb more heat than light ones. A black polyester shirt will hit a higher actual surface temperature than a white one at the same press setting. So this means dark fabrics are more prone to scorching, dye migration, and over-pressing.
For sublimation, you can only print on white or very light substrates anyway - the dyes are transparent, so dark fabric shows through. But for HTV, you need to adjust. Drop your temperature by 5-10 degrees on dark fabrics and check your results. Use white or light-colored HTV on darks, or grab specialty vinyl designed for dark garments.

Research from North Carolina State University’s College of Textiles has shown that thermal absorption rates vary significantly based on fabric dye concentration, which directly impacts heat press outcomes on colored garments.
Does Your Workspace Setup Set You Up for Failure?
Your press is only as good as the space around it. I’ve seen setups where the press is on a wobbly folding table, next to an open window, with rolls of vinyl stacked on top of the machine. That’s a recipe for inconsistent results.
Your press needs a stable, level surface that can handle the downward pressure without flexing. A solid workbench or dedicated press stand makes a real difference. Keep your workspace clean - stray adhesive, lint, and dust will all end up in your transfers.
Temperature consistency matters too. If you’re pressing in a garage that’s 45°F in winter and 95°F in summer, your results will vary even with identical settings. The platen temperature is controlled, but the ambient temperature affects how quickly your garment cools, how moisture behaves, and how adhesives cure. Try to work in a space that stays between 65-80°F.
And keep your silicone mats and protective sheets organized and accessible. Nothing slows down a production run like hunting for your nonstick sheet between presses.
Shop Related Products
Shop Heat Press Supplies
If you’re tired of ruined blanks and peeling vinyl, the right supplies make all the difference. Our heat press supplies collection includes PTFE protective sheets, silicone pressing pads, and nonstick materials that protect your work and your machine. Pair them with quality heat-resistant release papers for a setup that actually works the way it should.
Every one of these mistakes has a fix, and most of them cost less than the blank you’ll ruin if you skip the basics. Get your temperature dialed in, check your pressure, protect your surfaces, and respect the peel. That’s it. Four things that’ll save you more frustration than any fancy new press ever will.
Related Reading
- What Is heat press Parchment Paper and How to Choose the Best One?
- Silicone vs PTFE vs FEP: Which Nonstick Material Do You Need?
- How to Use Release Paper for Heat Press Projects: A Step-by-Step Guide