A large diamond painting (40cm and up) takes anywhere from 40 to 200+ hours depending on canvas size and drill type, but finishing one comes down to smart sectioning, the right cover material, and a few tricks most tutorials skip.

I spend a lot of time in diamond painting communities online, and the same question keeps popping up: “I started this huge canvas and now I’m stuck at 30%. How do people actually finish these?” The replies always surprise me. It’s rarely about motivation. It’s about method.
So I pulled together the most common advice from crafters who’ve actually completed canvases over 40cm, plus a few things I’ve picked up that make the whole process way less overwhelming.
How Big Is “Large” in Diamond Painting?
A large diamond painting is any canvas 40cm (roughly 16 inches) or wider on its shortest side, though most crafters consider 50x70cm and above to be where the real challenge starts. For context, a 30x40cm canvas has about 33,600 drill placements if you’re working with round drills at standard spacing. Jump to 50x70cm and you’re looking at roughly 98,000 placements. A 60x80cm? Over 134,000.
That’s not a weekend project. That’s a commitment. And it’s the reason so many large canvases end up half-finished in a closet somewhere.
The good news: every crafter who’s completed one says the same thing. Breaking it into sections makes the whole thing feel manageable. Nobody sits down and thinks “I’m placing 134,000 drills today.” They think “I’m finishing this 5cm strip.”
What Supplies Do You Need for a Large Canvas?
The supplies for a large canvas aren’t dramatically different from a smaller one, but a few upgrades make a real difference at this scale.
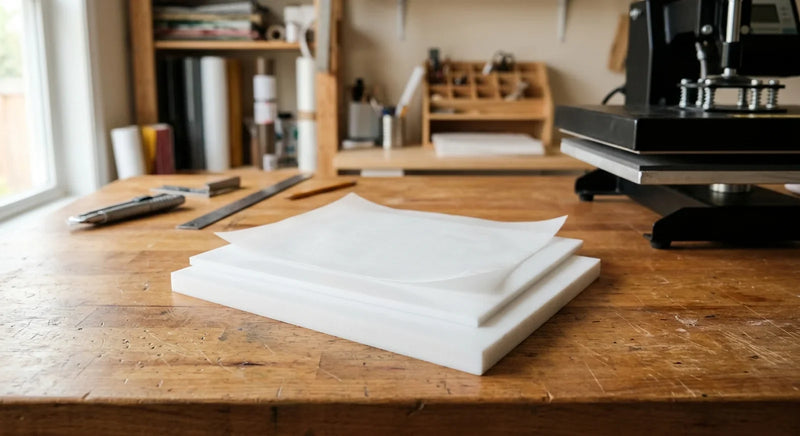
A quality release paper or cover sheet is non-negotiable. The plastic film that comes with most kits tears, curls, and loses its tack within a few sessions. Silicone-coated release paper lies flat, peels cleanly, and can be repositioned dozens of times without leaving residue. For a 50x70cm canvas, you’ll want legal-size sheets (8.5x14”) so you can cover wider sections without overlap gaps.
Beyond that, stock up on:
- A multi-placer pen (the single-tip pen that comes in the kit will drive you crazy at this scale)
- Extra wax or putty (you’ll go through more than you think on a 100,000+ drill project)
- Small glass storage jars for sorting drills by color (the tiny bags rip, spill, and make color-matching a nightmare)
- A light pad if you’re working with a darker image (at this size, distinguishing between similar symbol codes gets tiring fast)
- A silicone craft mat underneath your work area to catch any drills that bounce off the canvas
Pro Tip: Reviews on large canvas kits consistently mention that round drills are faster to place but leave tiny gaps between placements. Square drills create a tighter mosaic look with no visible gaps but take roughly 20-30% longer per section. If speed matters to you, go round.
How Do You Section a Large Diamond Painting Without Losing the Sticky?
You section it by uncovering only the strip you’re actively working on (typically 3-5cm wide), keeping the rest sealed under release paper or the original cover film. The adhesive on most quality canvases stays tacky for weeks when covered, but exposure to air, dust, and pet hair degrades it fast.

Here’s the approach that works for most large-canvas crafters:
Step 1: Start from the top of the canvas, not the bottom. Gravity pulls loose drills downward, and you don’t want them landing on finished sections.
Step 2: Peel back your cover sheet in a horizontal strip about 3-5cm wide across the full width of the canvas.
Step 3: Work left to right (or right to left if you’re left-handed) across that strip, completing one color at a time within the exposed area.
Step 4: Once the strip is done, peel the next 3-5cm and repeat.
Step 5: When you take a break (even overnight), press your release paper firmly back over the exposed section. Silicone release paper is better than the original film for this because it doesn’t stretch or warp after repeated peeling.
The number one mistake people make on large canvases? Uncovering too much at once. A crafter in one community shared that they exposed a full 20cm section, got interrupted for three days, and came back to find the adhesive had collected enough dust to reduce tack by about half. They ended up having to apply craft glue to individual squares to get drills to stick. That’s fixable, but it’s hours of extra work you don’t need.
If you do lose stickiness on a section, check out our guide on keeping your diamond painting canvas sticky for recovery techniques.
How Long Does a Large Diamond Painting Actually Take?
A 50x70cm diamond painting takes most crafters between 60 and 120 hours, spread across 4 to 12 weeks of regular evening sessions. The range is wide because speed depends on drill type, image complexity, your multi-placer technique, and how often you take breaks.
Some rough benchmarks from experienced crafters:
- 40x50cm (round drills): 30-50 hours
- 50x70cm (round drills): 60-90 hours
- 50x70cm (square drills): 80-120 hours
- 60x80cm (round drills): 90-140 hours
- 80x100cm (square drills): 150-250 hours
According to the Craft Industry Alliance’s 2024 survey on crafting habits, the average crafter spends about 7-10 hours per week on their primary hobby. At that pace, a 50x70cm canvas takes roughly 8-12 weeks. That’s not a problem if you know it going in. It only feels overwhelming when you expect to finish in two weeks and you’re still at 40% on week four.
Note: Multi-placer pens (3-placer or 5-placer) can cut placement time by 30-50% on sections with large color blocks. They’re less useful on detailed areas with lots of color changes, but for backgrounds and skies they’re a real time saver!
What Do You Do When You Hit the Motivation Wall?
Every large canvas has a motivation wall somewhere between 40% and 70% completion. The initial excitement is gone, the end isn’t visible yet, and you’ve been staring at the same image for weeks. This is where most unfinished canvases get shelved.
The crafters who push through it share a few strategies that actually work:
Track your progress visually. Take a photo at the end of each session and compare it to last week’s photo. The progress is always bigger than it feels in the moment!
Switch sections temporarily. If you’ve been grinding through a dark, detailed area, jump to a lighter or more colorful section for a session or two. You’re still making progress, but the change of scenery keeps things fresh.
Set small goals, not big ones. “Finish color DMC-310 in this strip” is achievable tonight. “Finish the whole sky section” is a recipe for frustration.
Work with company. Put on a podcast, an audiobook, or a video call with another crafter. Diamond painting is repetitive by nature - having audio stimulation makes the repetition meditative rather than tedious.
A study published in the Journal of Positive Psychology found that craft activities producing visible, tangible progress activate reward pathways similar to exercise. The key is making that progress visible to yourself, which is why the photo tracking method works so well.
And if your drills start popping off during the long haul, our guide on why diamond painting drills fall off covers the most common causes and fixes.
How Do You Seal and Display a Large Finished Piece?
Once you place that last drill (and yes, the feeling is incredible), you still need to seal and mount the piece properly. A large canvas that isn’t sealed will lose drills over time, especially in a frame with glass that can shift them during transport.
For sealing, most crafters use a brush-on sealant rather than a spray for large pieces. Spray sealants tend to pool in the gaps between drills at this scale, creating a cloudy film. A thin brush-on coat (one layer, not three) preserves the sparkle while locking everything in place.
For framing, large diamond paintings need a frame with enough depth to accommodate the drill height. Standard photo frames press the glass directly against the drills, which flattens them and kills the shimmer. Look for shadow box frames or frames with at least 3mm of depth clearance.
We’ve got a full walkthrough on framing your finished diamond paintings with specific frame recommendations by size.

If you’re looking for a way to store supplies between sessions, consider switching from plastic bags to actual glass containers - they keep drills organized, they don’t generate static the way plastic does (static makes round drills cling to everything), and you can see the colors without opening anything.
Shop Diamond Painting Supplies
Ready to tackle your next large canvas? We carry the diamond painting accessories that serious crafters rely on, from silicone release paper that actually stays flat to storage solutions that keep 50+ drill colors sorted and accessible. Check out our full craft supplies collection for everything you need to set up a workspace that makes large projects feel manageable instead of overwhelming.
Looking for the perfect gift for a fellow diamond painter? Check out our guide to the best diamond painting gifts for crafters - it covers the supplies experienced painters actually want.